M3-Pattern vs surface
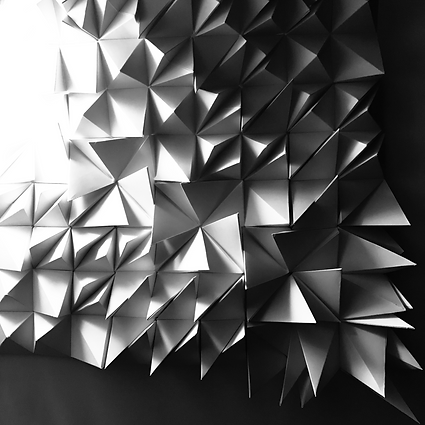
Plan view photography of final assembly model
Module 3 is considered as the most challenged and massive tasked module to me so far in this semester, not because it explores the three-dimensional modelling which I never tried before, but also due to massive works for cutting and folding jobs with the unrolled and print surfaces.
We are given with a base terrain, selected from the actual Tasmania landscape, and we need to create, generate some developable surfaces based on the 10 to 10 base grid in Rhino 6. We are also required to make an actual model from the model designed digitally in Rhino, and doing photography to record the result of the project. Personally, I consist of the learning goals of this module into three parts: 1, Learning basic Rhino panelling tools and other 3-D Modelling basics. 2, Familiarize with the 3-D design & modelling workshop environment for futural tasks. 3, Practice modelling skills and patient as an individual dealing all the tasks.
Stage 01: Learning Rhino 6 Basics, pannelling tools, and practice modelling with base terrain.

Offset points on base grid
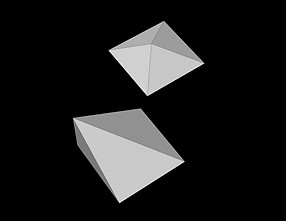
Using ptPanel3D fundamental
with Pyramid module
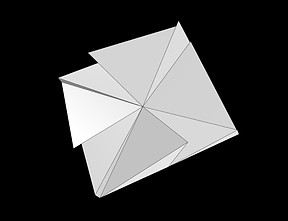
Using ptPanel3DCustom
with customized module
First Workshop contains information about basic Pannelling tools. I learnt how to offset points on my base grid, using ptPanel3D to create fundamental pyramids, and ptPanel3D Custom to design with customized modules. This week is considered as the practising and learning period for Rhino commands.


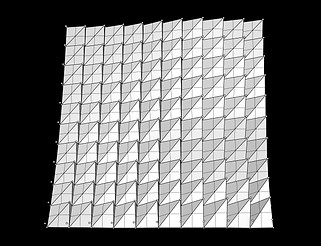
ptPanel3DCustomVariable
ptPanel3DCustomVariable
playing point attractor
ptPanel3DCustomVariable
playing curve attractor
After the second workshop, I started to experiment with the model with more variables and other attractor modes. I use the same six modules but different attractors, include manual selected points, single curve attractor and double curve attractor. The playing of these modes enable me the ability to apply these modes into the final design, also gives me a measure to find inspirations.
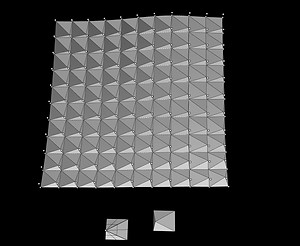
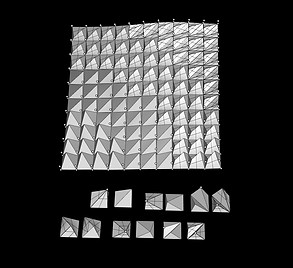
The final design for the pyramid model
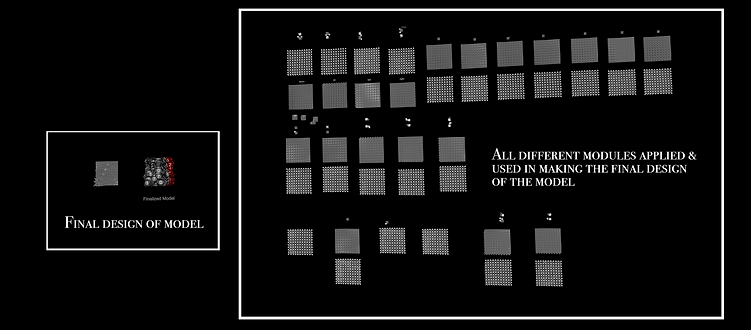
The area on the left is the meshed and unrolled final design, and the right side is the modules used to make the final design, and their own ptPan3D results. This is made to replace several pyramids in the final design to perfect the design. Nearly 60% of the pyramids in the final design are not from the original ptPanel3DCustomVariable model, but the replacement from the models in the right area.
Modules (Component) used


Final Rhino design
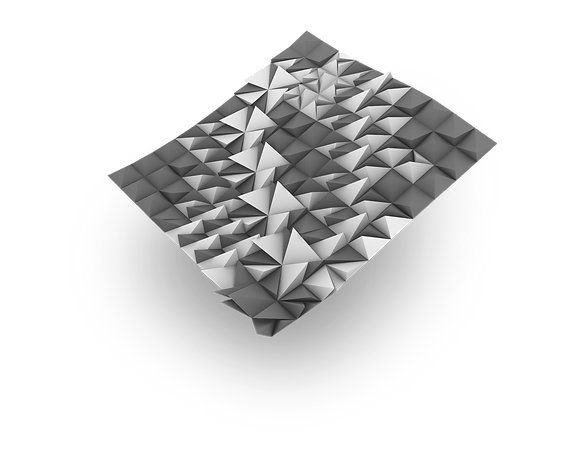
My design is initially made with an inspiration of the tail wave of boats when sailing in water. The highest part of the model's module is in the lowest part of the base terrain, meanwhile, the lowest part of the module is at the highest part of the terrain, which achieves a balance. The model layout emphasis the horizontal fluctuation of the tail wave, the turbulence that creates elements of unstable based on the original structure. Personally, I think that would be interesting to see such structures when taking photography works at the final stage of the project. The cones that with a strong directionality at the lowest part of the terrain unites the whole model into one, itself is a quite interesting module, which is inspired by the Iron Throne.

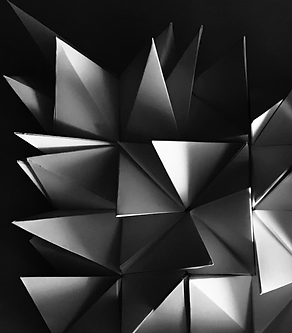
Effect of Iron Throne in cones structure designed in the final design
Stage 02: Post-production on unrolled surfaces & Model making

Rhino to Adobe Illustrator: Modification on unrolled surfaces
Doing modifications on the 100 unrollsrf components. Emphasis the tabs and drag the number of edges back into the surfaces for printing. Several complicated components are and only can be broke down one by one, and others can be joined and then broke down as a whole.
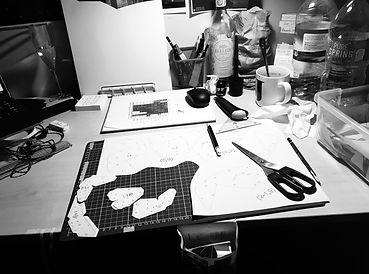
Model Making
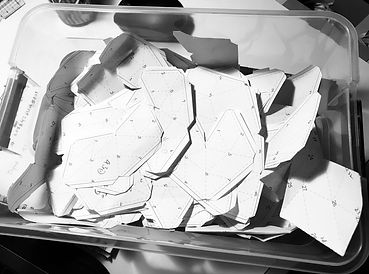
Tabs that have been finished cut
Cut the surfaces along the tabs
Unrolled surfaces are printed on A3 papers, cut along the tabs and then copy again along with the tabs. I use burin to scratch a trace along the folding line, thus it could be easier to fold with a nice folding trace. Double sided tapes, masking tapes, PVC glues and stapler are used to stick the ivory card together.

Finished folding pyramids - results of too many non-sleeping nights
Stage 02: Photography of the finished model
I applied a large contrast of light and shadows in the final photography stage. Not because of special reason but as I'm a huge fan of chasing light and shadows. Sometimes I change the viewing angle of the perspective to create special senses when viewing at these photos. I always emphasis the lighting on some low height modules, thus more shadows will be created and appear on some, later on, 's higher modules (components), that makes the whole scene more lively, and entrust a sense of movement through the lighting, in contrast to the stilling of pyramids.


Result photography & photostage
A general Reflection: Pattern vs Surface
Looking back through Module 3 I think there's always too much to talk about. It is an extremely long, progressive, interesting but extremely painful process for the past four weeks. When I consulted my friend, who is also a second-year student learning architecture in MSD about how's first semester's subject felt like, he told me about the joys of doing M2 and M4, but also emphasised how Module 3 tortured him at that four weeks. Now I have nearly the same feeling after this task's finished. Four weeks of time, from learning Rhino basics, panelling tools, to experiment and finalize the design of the model, to days and sleepless nights doing the cutting, folding and assembling tasks, to the final stage of taking photos. Meanwhile, we have to deal with the problem of exceeded demand vs limited resources, booking camera kits, photo stage and project rooms. These all required massive detailed planning, otherwise fail will become the destination all the way from the beginning.
Module 3 introduces the designing from a two-dimensional axonometric painting, into a three-dimensional digital design, which is an area that I have never accessed to, but also offers me new opportunities and possibilities of doing creation. Representation of design no more stays in a two-dimensional surface that requires viewers to imagine and understand the spatial meaning. Modelling brings the representation into reality, with ideas presented more directly and clearly. Meanwhile, the improvement in digital technology, that offers a better platform for three-dimensional modelling design, gives chances for preview before the model is made in reality. The first impact that Rhinoceros gives me is that there is that moment, that I suddenly see so many potential possibilities of what my future designs will ahead, just like a door is opened, and a whole new world sits there and ready for me to explore. Rhino has export options covered from an image design, 3D printing, to recreate the planet landscape entirely on the laptop. Apart from that I also see the potential of "folding", which exists as both a concept and a technique, that could break a complicated design into simple shapes like the triangle or diamond shapes.